
The fact is that the sensor is sending the glucose measurements continuously to the Abbott Libre Link App by Bluetooth, because when a hypoglycemia or hyperglycemia happens, the sound at the mobile, even if you are not measuring glucose at that time with the NFC of our daughter’s mobile. So, let’s try to take advantage of this functionality to collect glucose measurements through the Bluetooth patched App and send them to xDrip.
xDrip is the most well-known and complete App used by the community of people with diabetes. It is a spectacular development made with Open Source code by a series of developers such as Jamorham, Navid Fo along with other members of the xDrip team. Thank you very much for making this fantastic development!
This App was created in 2014 from the development of DexRip made by Emma Black and for which it was called xDrip. It was an app that collected continuous data from a G4 receiver or a bridge and sent them to Nightscout. This application was later modified by Jamorham and became xDrip+. Today xDrip+ is published by the Nightscou foundation. You can find information about xDrip+ in this link, and in this other link.
Through this article you will learn how to connect the patched App that sends these measurements continuously to xDrip. At this moment xDrip is going to become an «Uploader» of the Nightscout ecosystem, allowing to visualize the glucose readings continuously in the App itself and send them to Nightscout at the same time. In Nigthscout we can store the data, share it with followers (like parents), visualize them on our smart watch / band, request voice readings from Alexa at your home and many more things. Don’t you think it’s great?

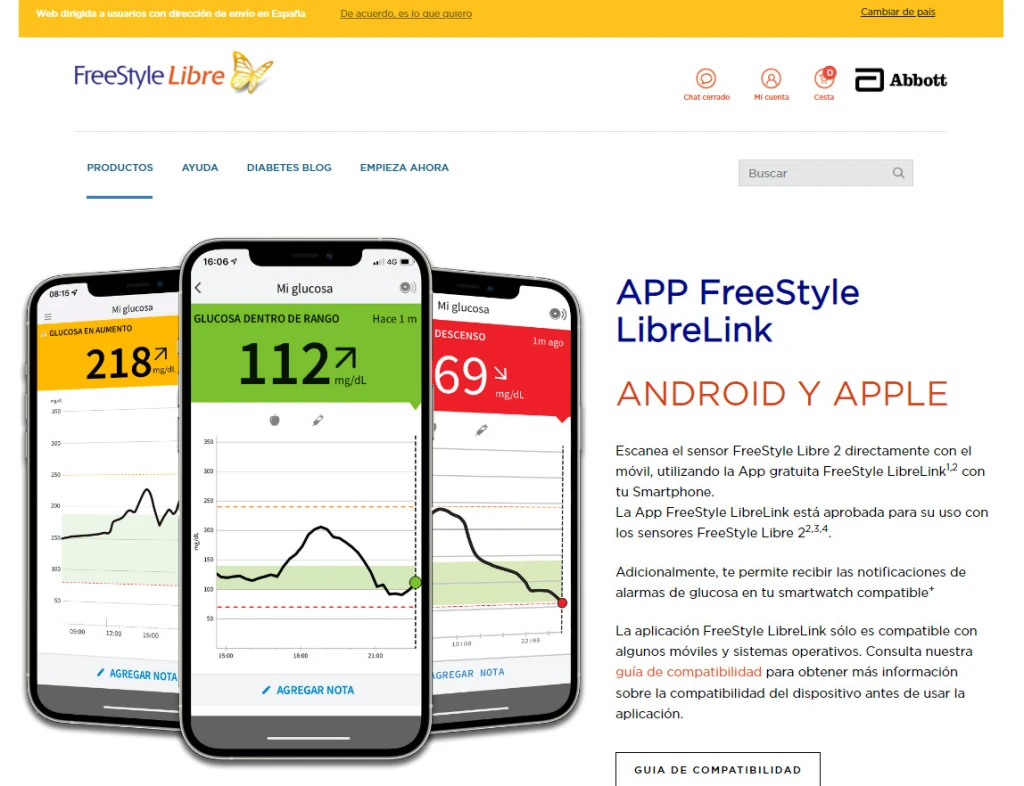
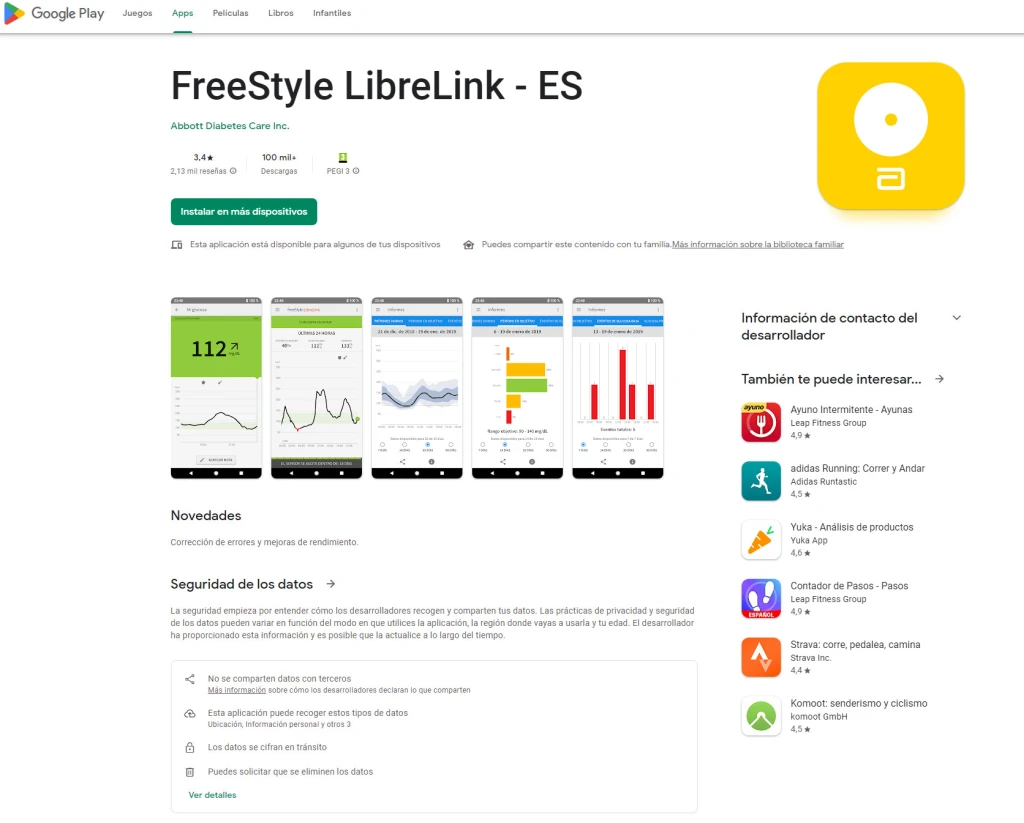
Installing the original Librelink App
Once you have installed it and the App icon appears on your mobile, start it with a click on the App icon. Do not go beyond the first screen of the App. Go back to the main menu of the mobile where the icon of the App was and press it, leaving the icon pressed with your finger. You will see that on the icon of the App appears a menu where one of the options is «Uninstall the Application». Click on that option and uninstall it.
Although this step seems a bit strange, it is important to do it at the beginning: we install the official App and uninstall it.
Now we move on to the next phase of installing the patched App.
Installing the patched App
Do you remember that in the previous article we ended up with the step of copying the patched App from the computer to the mobile through a cable? Well, if we have done this step, we will have on our Android mobile the patched App (the file .apk). If you do not want to move the App from your computer to your mobile phone by cable, you can also use another system to share files, such as OneDrive, Google Drive, Dropbox or even Wetransfer.
Once located the place where we saved the patched App on our child’s mobile, click on it to run it. If this is the first time you install an App from third parties or from unknown sources, a menu will open where you have to select the option «Allow from this source». This will allow you to install an unofficial App (file .apk) on your mobile terminal.
This patched App is different from the official one. It will not allow you to share the data with other mobile phones or upload them to the LibreLink website for your endocrine doctor to see. It will only be valid to capture the data of your sensor continuously by Bluetooth and send them to XDRip, as we will see later.
Now let’s enable some options of the patched App:


Once the patched App options are enabled, you have to start the patched App and set at least one alarm. This is important because the high and low glucose alarms will sound later in this App, apart from the fact that you can also configure them later in XDRip.
If you have doubts about how to configure the alarms in the patched App, I leave you below a video of the App so that you learn how to do it and handle with them.
Reinstalling the LibreLink App
At this moment two Apps will coexist on your mobile, the official LibreLink App and the patched one. It is important that you have both Apps on your child’s mobile, the official App to scan the sensor from time to time (maximum every 8 hours) and share all the measurements with your endocrine doctor (which will always access to your recorded data through the official LibreLink channel) and another App that will be the patched App that will sends the measurements continuously to XDRip.
It is important to remember that when we start the sensor, every time you change it, always start it with the patched App. And once the sensor has been initially set up (usually about 60 minutes), then scan the sensor again, but this time with the original App, which will tell you that you already have the sensor started and ask you if it is new. In this way you will have the measurements in the two Apps always.


Installing XDRip and Configuring Data Source
The first thing we have to do is to download the latest stable version of XDRip on your child’s mobile, which is where the patched App and the original App are installed, as we have indicated in the previous sections.
To download the latest version of XDRip you have two options. First one is to install the latest stable version, which you can do here: latest version XDRip stable and is the most recommended option, because it is a tested version and works correctly. Second option, for the more «innovative» guys in the room: you can also download the latest Beta version of XDrip, which you can download here: latest XDRip Beta version. In this version there may be instabilities or there may be errors or unresolved bugs. Once you enter the Web, select the latest version and download the «.apk» file from the Github repository, which you can install on your mobile to have XDRip.

Once you have downloaded the apk file according to some of the two options indicated, you will have to run it so that XDRip is installed on the mobile. At the moment you have it installed, you can run it and you will access the initial screen of XDRip (accept the permissions that they indicate at the beginning).
When XDRip starts, the «Data Source Selection» screen will probably open. If it does not open automatically, you can click on the button on the initial screen that says «Start Data Source Wizard». On the screen that opens to you, select «Free» and on the next screen select «Free 2 Patched»
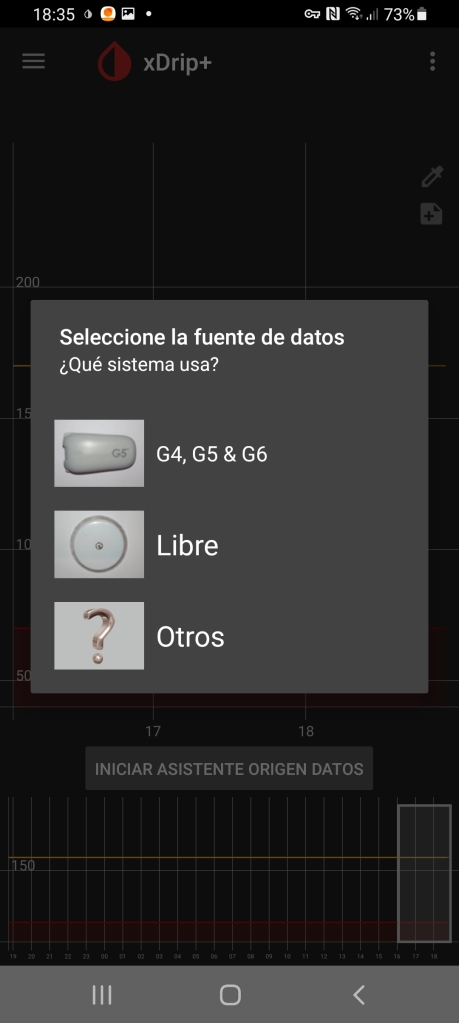

At this moment you will be telling XDRip that the data source that it is going to show you is going to be from the patched App, which is the one that is going to send XDRip the continuous glucose measurements when capturing them by Bluetooth.
Configuring XDRip settings.
At this time we will only have to configure all the XDRip options so the data from the patched App is going to be perfectly ingested into XDRip.
First, let’s configure the “XDRip log” to log additional error messages. To do this we will go to Settings (through the hamburger menu – three horizontal stripes – in the upper left of the main screen) and there we will select «Less common settings». In the next menu, we will select «Additional Registration Options».

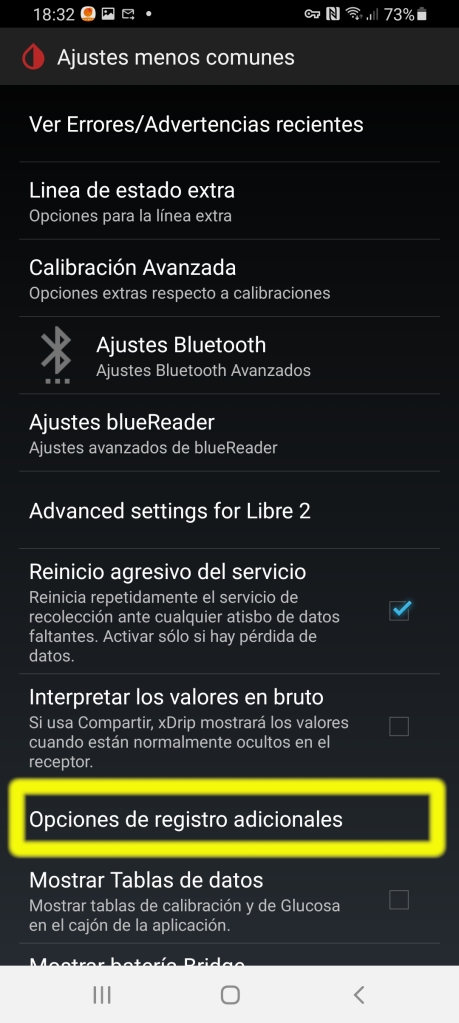
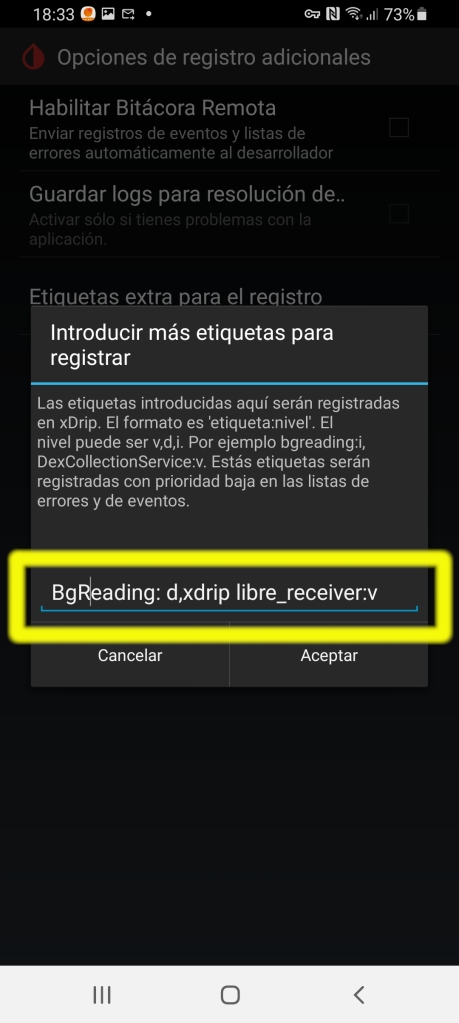
Already in the «Additional registration options» menu select the option «Extra tags for registration» where you will have to enter the following text: «BgReading: d, xdrip libre_receiver: v». You can see it in the following two images.

Now let’s configure XDRip so that you can capture data locally. To do this, you have to go to the initial menu of Settings and select «Interface Settings». Once you enter the next menu, click on «Stream Locally» and select «On».

Next, we are going to deactivate the treatment settings, so that XDRip does not incorporate them. To do this, in the last Menu of «Settings between Applications» select the option «Accept Treatments» and put it in «Off».


Well, that’s it! Why hasn’t it been so difficult to set up XDRip? I admit that maybe the method is a bit long, but I think the result is worth it, because we can have the continuous readings of our sensor in XDRip and then connect with Nightscout. So cheer up! that we no longer have much left to finish.
Start Sensor with patched App
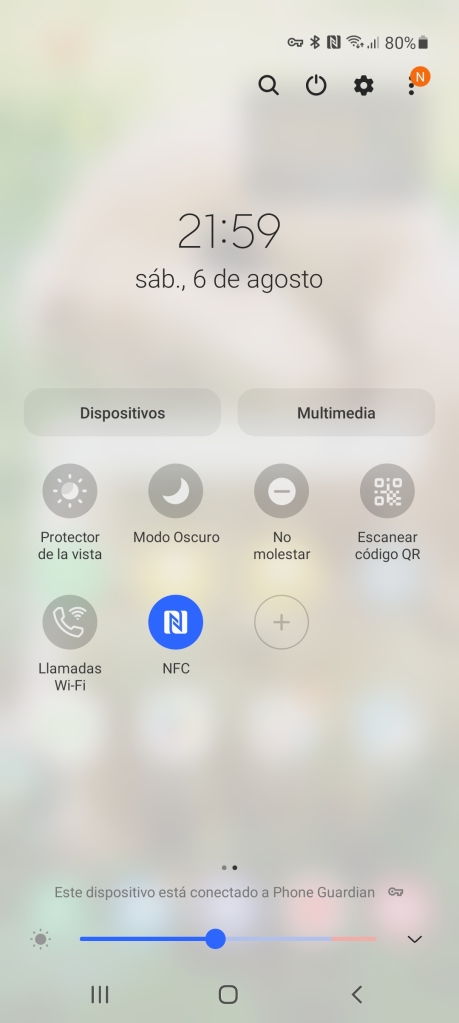
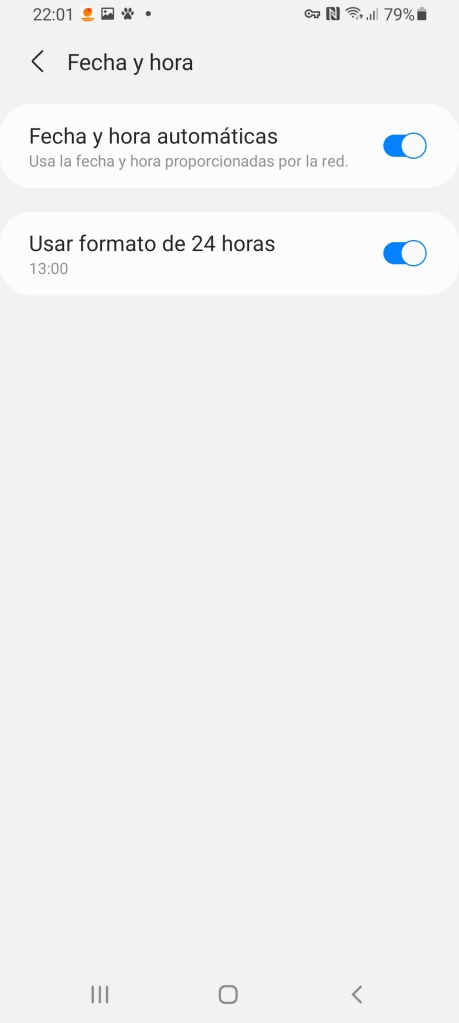
Now we have to start the glucose measurement sensor with the patched App. To do this, I recommend that you check that everything we did in the first sections to configure the patched App was correctly done. I remind you what you have to check:
- Bluetooth of the mobile activated.
- NFC of the mobile activated.
- GPS location enabled.
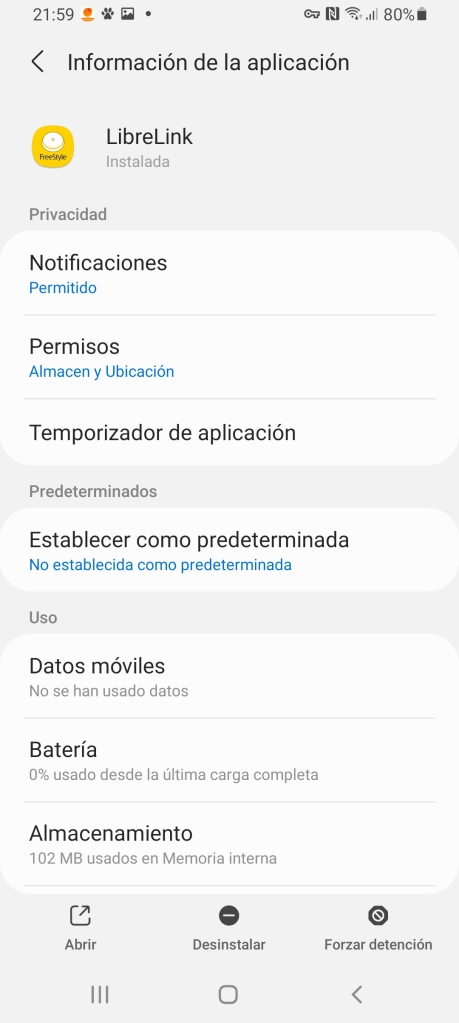
- Store and Memory permissions enabled in the patched App.
- Automatic time and time zone configuration.
Then, when we have verified that everything is correctly configured, we proceed to open the patched App and pass the mobile through the sensor to start it with NFC.
At this time it will ask you if you are activating a new sensor. You have to say “yes” and the 60-minute phase of self-configuration and calibration of the sensor will begin.
Next, we will have to tell XDRip that we have put a new sensor and that its useful life begins. To do this, enter XDRip and click on the hamburger button on the left above (the three horizontal stripes) and select the option from the «Start Sensor» menu. Click on the home button of the sensor and then on «not today» and you will have indicated to XDRip that you have installed a new sensor.


This is simply to indicate to XDrip that we have introduced a new sensor and to start counting the days of life that the new sensor has.
As soon as the sensor is finished self-configuring, after 60 minutes, the first values of glucose measurements will appear automatically in XDRip. And we can already receive every 5 minutes the measurements of our glucose sensor automatically!


Sending data from XDRip to Nightscout
Now for sure many of you will be wondering «okay, this is very good, but what is the point of seeing the continuous measurements of my daughter on her mobile, if what I want is to be able to see them on my mobile, when I she is at school or at night when she is sleeping!» And you’re absolutely right, but that’s what we’ve set up Nightscout for before, as I indicated in my article «How to install Nightscout for clumsy (like me)«. If you have not already done so, I encourage you to do so by following this tutorial. Well, this step will allow us to send all the data of glucose measurements from XDRip to Nightscout and there to be able to store the information and share it with other users of XDRip, Diabox, etc. It will also allow us to automate some actions, as I will tell in another of my Digital Diabetes publications. So, when we have an alert, we can make our Alexa at home warn us, for example, that our daughter is in Hypo or Hyperglycemia. It will also allow us to see the glucose measurements on our smartwatch. In short, a world of possibilities opens up before us!
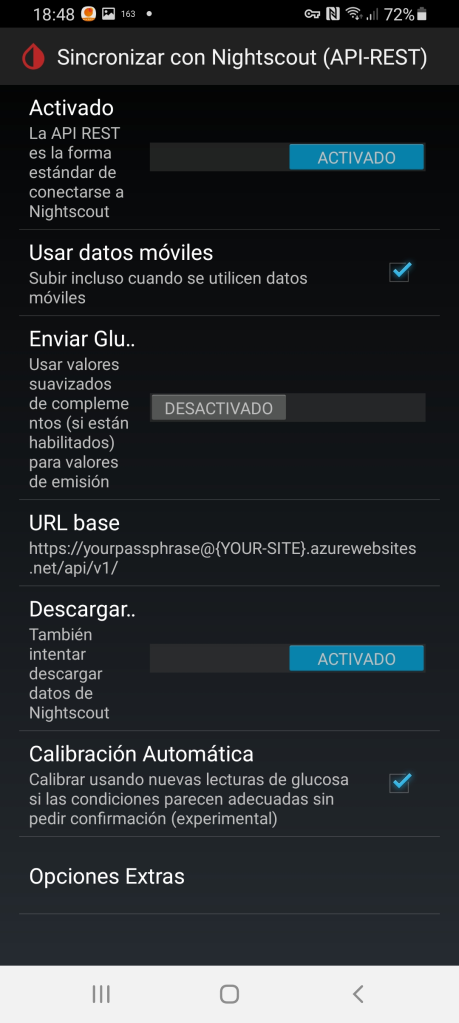
To do this, the first thing you have to do is enter the Settings menu and select the «Upload to the cloud» option. The corresponding menu will open where you will have to enter the option «Synchronize with Nightscout (API-REST)».
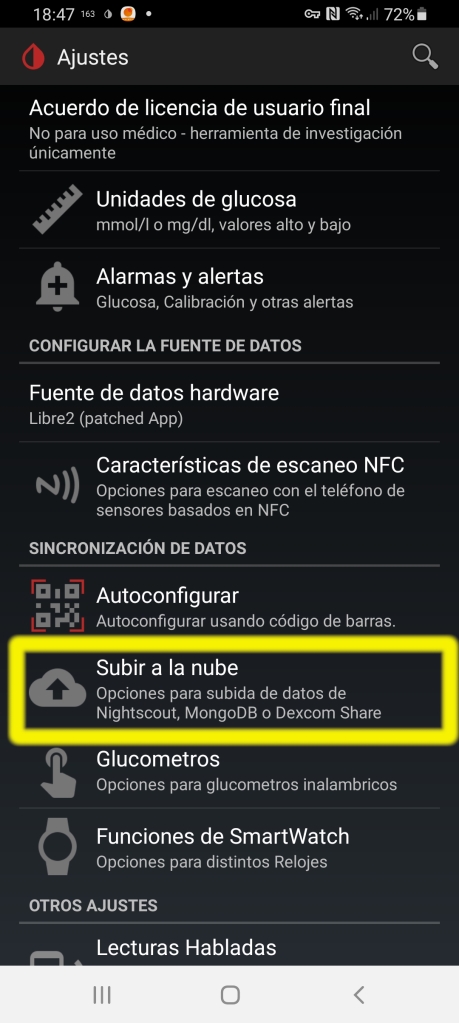

Once you have selected this option, you will have to configure all the menu options as you can see in the image below. In the base URL option, you’ll need to enter the credentials you defined when setting up your Nightscout instance on the web: the web address of your Nightscout site and the API-Password (your password for other apps to connect to Nightscout). In my case when I created my Nightscout site in the example of my article, the web address was this: «https://prueba.10be.de:6392/» and the API-Password was «passwordAPI». The format for you to write it is this:
- https://%5BAPI-Password%5D@%5BDirección Web de Nightscout]/api/v1/
- Ejemplo: https://passwordAPI@prueba.10be.de:6392/api/v1
And once you have done this step, all the glucose measurement data that reaches XDRip, will be sent to your Nightscout website and you can consult them on the web. From this moment all the data will be yours and you can store and exploit them from Nightscout! The magic is done.

Share data from Nightscout with other XDRip users
In order to share the data you are uploading to Nightscout with other users who have XDRip installed, a new version of XDrip must be installed on those users’ mobile. It is done in the same way as we have indicated in the section «Installation of XDrip and configuration of data source«. Only in this case, instead of selecting the patched App as the data source, we are going to select Nightscout as the data source. In this way we will configure this mobile with XDRip as a follower of Nightscout (a follower).
In the Settings menu select «Hardware Data Source» and in the next menu «Nightscout Follower».


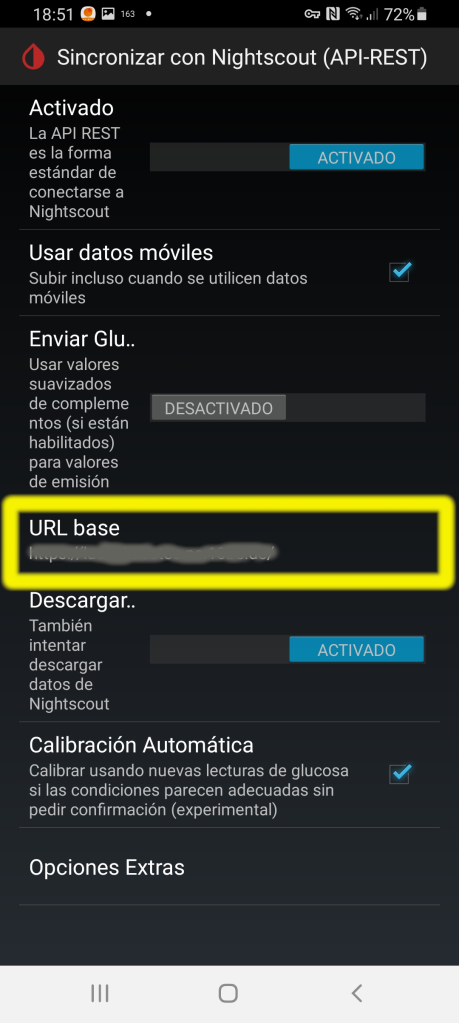
Once we have done this step, we will return to the Settings menu and select the option «NIghtscout URL to follow». A window will then open where you can enter the address of your Nightscout website. In the case of my previous example I entered «https://prueba.10be.de:6392/. You can see it in the image below.


And at this time we will have configured this mobile with XDRip installed in a follower of Nightscout and therefore of your child’s mobile that sends the data to Nightscout through the patched App and XDRip.
If you want to check that everything is working correctly, and you click on the hamburger menu on the main screen and select «System status» you can see, by scrolling with your finger to the right, the «Nightscout Follow» configuration and the status of it. As you can see in the image below you will have the record of when the last readings were made and the connection with your Nightscout website, which is working perfectly.

With this procedure of «creation of followers» (as in social networks) we will be able to see all the data that is being uploaded in Nightscout in as many mobiles as followers we create with this method. There is no limitation on the number of followers you can create, so you can share your child’s glucose data with your child parents, grandparents, teachers, etc. All thanks to XDRip and Nightscout!
XDRip widget to access glucose data quickly
And to finish this article I wanted to tell you a very useful trick that I usually apply on the mobiles of the followers, the XDRip Widget.
A Widget is a small window on the main screen of the mobile that gives you a summary with the most relevant values of an App. It is very useful for monitoring Apps where what you want is, at a glance in the mobile, see an important value quickly. In our case, the latest glucose measurement and the trend of glucose evolution.
To be able to implement this XDRip Widget on the main screen of the mobile, you have to click on the XDRip App icon leaving your finger pressed on it until a pop-up window appears. On that screen you will see an option called «Widget», select it and you will include in the main screen of the mobile a mini-screen of XDRip where you can see the main values requested. This Widget can be moved by clicking on it and, leaving your finger pressed, drag the icon to different parts of the screen or to other screens of the mobile. I encourage you to use it, it’s super useful!


Configure XDRip
Surely now that you have XDRip on your mobile you really want to learn how to manage this complete App and be able to understand each of its features.
The truth is that it is a very complete and at the same time it is a complex App, so for all those who want to understand any of the functionalities or have doubts about any of the options, I recommend that you visit the Web where everything is explained in detail. I leave you here a link.
Conclusions
The truth is that the first time I did it seemed almost magic. After spending many months blind about my daughter’s continuous glucose measurements, when she went to school or at night sleeping, trusting that, when the LibreLink alarms sounded when she was in hypoglycemia or hyperglycemia, I would be able to react quickly. Now I could already be able to see my daughter’s glucose measurements continuously and not have to rely on the App to warn me but be able to see the measurements myself remotely whenever I wanted, it seemed to me like an incredible advance!
The truth is that I think we should thank a lot for the work done both to the Nightscout Foundation #WeAreNotWaiting and to the team of Open Source developers who have collaborated in developing XDRip, highlighting jamorham main developer of XDRip as well as wixel, parakeet and other developments that help a lot to make the lives of those who have diabetes, like my daughter, and her parents much easier. A thousand thanks to all of them!
And from my side, I’ll finish here this article of my Blog. Maybe it was a bit long, but I wanted to specify in detail each of the steps I followed. XDRip has helped both my wife and I a lot in the monitoring and management of my daughter Luchi’s diabetes. So, I hope it will be as useful to you as it has been to us.
Regards,
Daniel

